資料來源
重點摘要
在 local 端建立 strapi app。
建立專案
輸入以下 command 建立專案:
npx create-strapi-app 專案名稱 --quickstart
建立完成後會自行啟動,初次執行時會進入 register 畫面 (http://localhost:1337/admin/auth/register),輸入 Username、Password 和 Email 之後進入主畫面。
規劃資料型別
首先來定義資料集合的名稱,以及各個資料欄位的型別和限制 (有點類似 MongoDB 定義 Schema)。
進入內容型別建造器 (Content-Types Builder),建立新的集合類型 (Create new collection type)
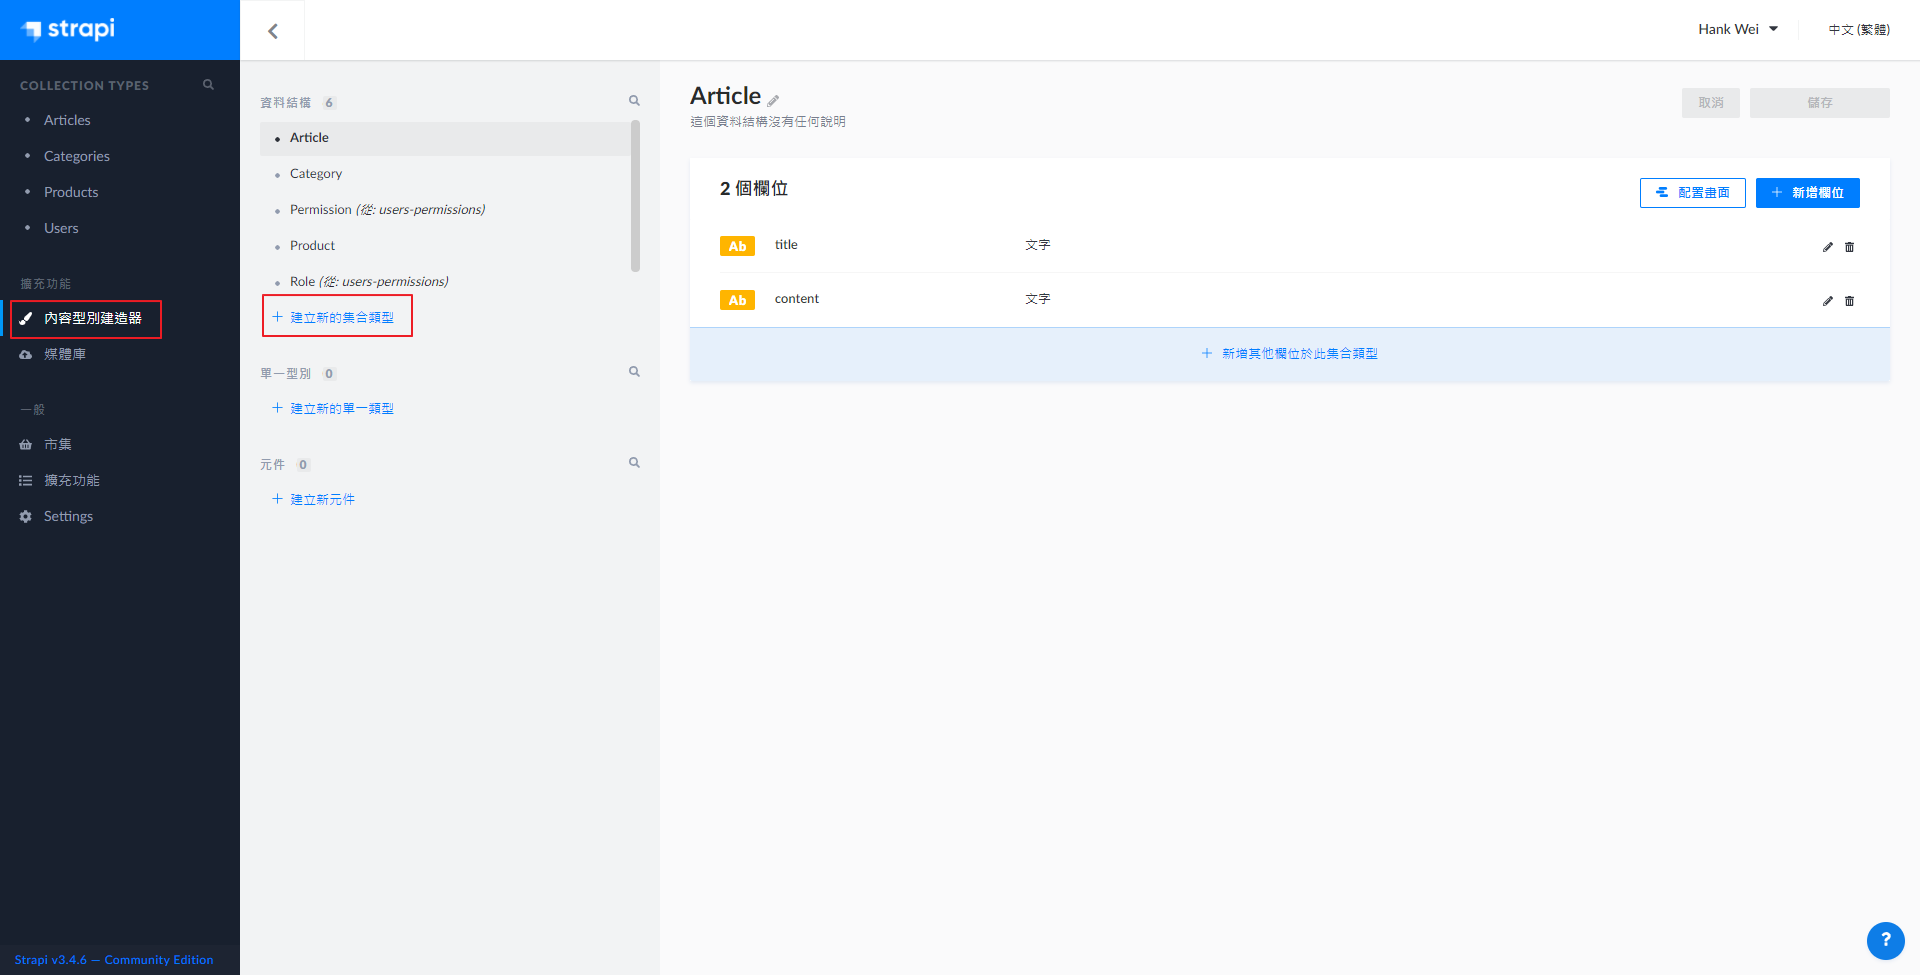
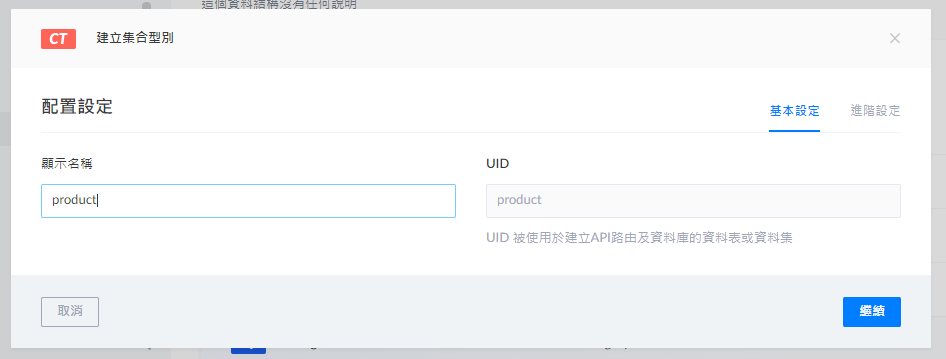
新增一個取名為 product (注意這裡命名為單數型) 的 collection type
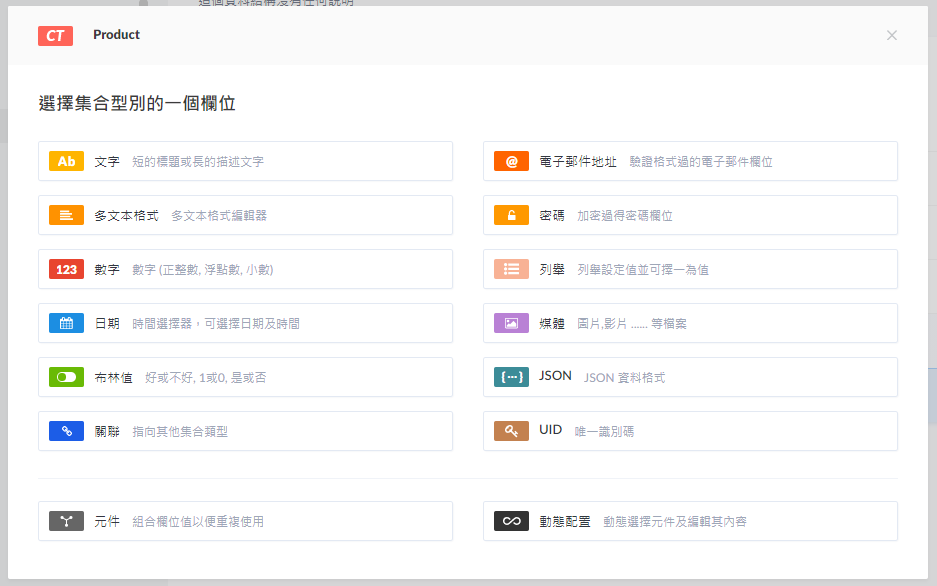
按繼續以後會有各種資料型別可供選擇
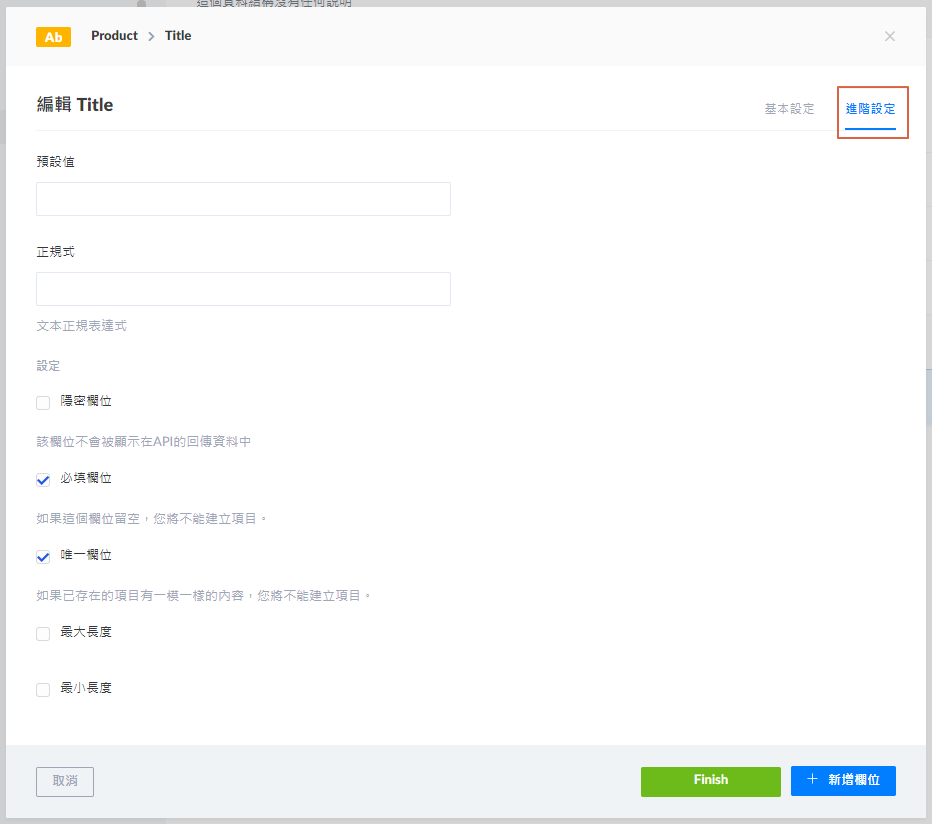
以文字為例,填入欄位名稱並選擇型別
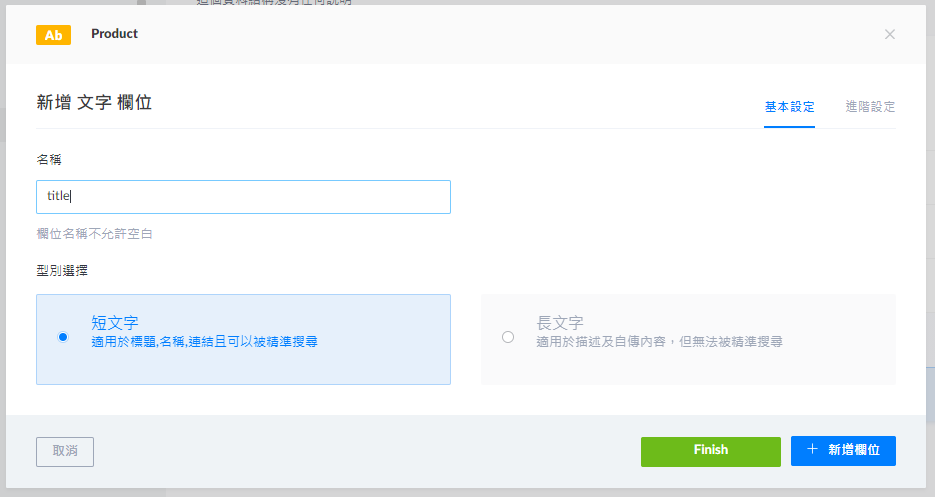
可以在進階設定給予其他限制,例如該欄位必填或唯一。點擊新增欄位即可繼續新增其他欄位,點 Finish 則結束新增,記得要儲存
除了 product 以外,再另外新增一個 collection type - category,定義欄位如下圖:
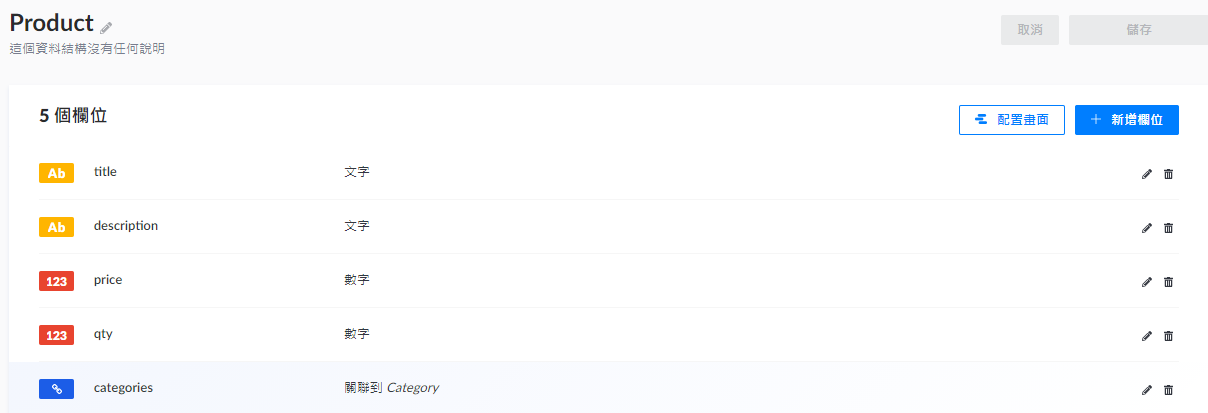
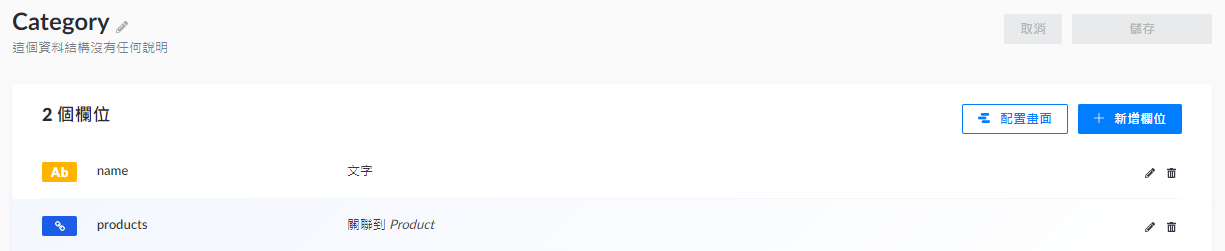
從上圖可以看到 product 和 category 各有一個關聯 (relation) 欄位,這個欄位可以和其他 collection 建立聯繫,例如 Categories 有三筆資料 (A、B、C),product collection 設定一個 relation 欄位和 category 關聯,這個欄位就會出現 A、B 和 C 的選項可供選擇 (這只是其中一種關聯方式)
填入資料
建立新的集合類型以後,可以發現左上角出現該 collection name 的複數型
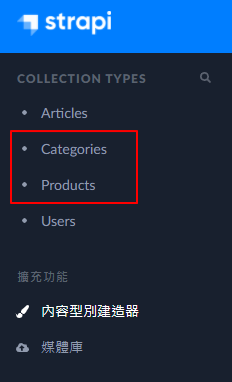
進入 Products,點擊建立新的 Products 即可填入資料。填寫完畢後記得要儲存並 Publish,之後 call API 才會找得到這筆資料

修改 Public 身分權限
這裡用 Postman 來測試 API。一開始 GET http://localhost:1337/products 會回傳 error,這是由於權限不足所導致。
進入 Settings > 身分 > Public,這裡可以設定該角色 (Public) 操作各個 collection 的權限
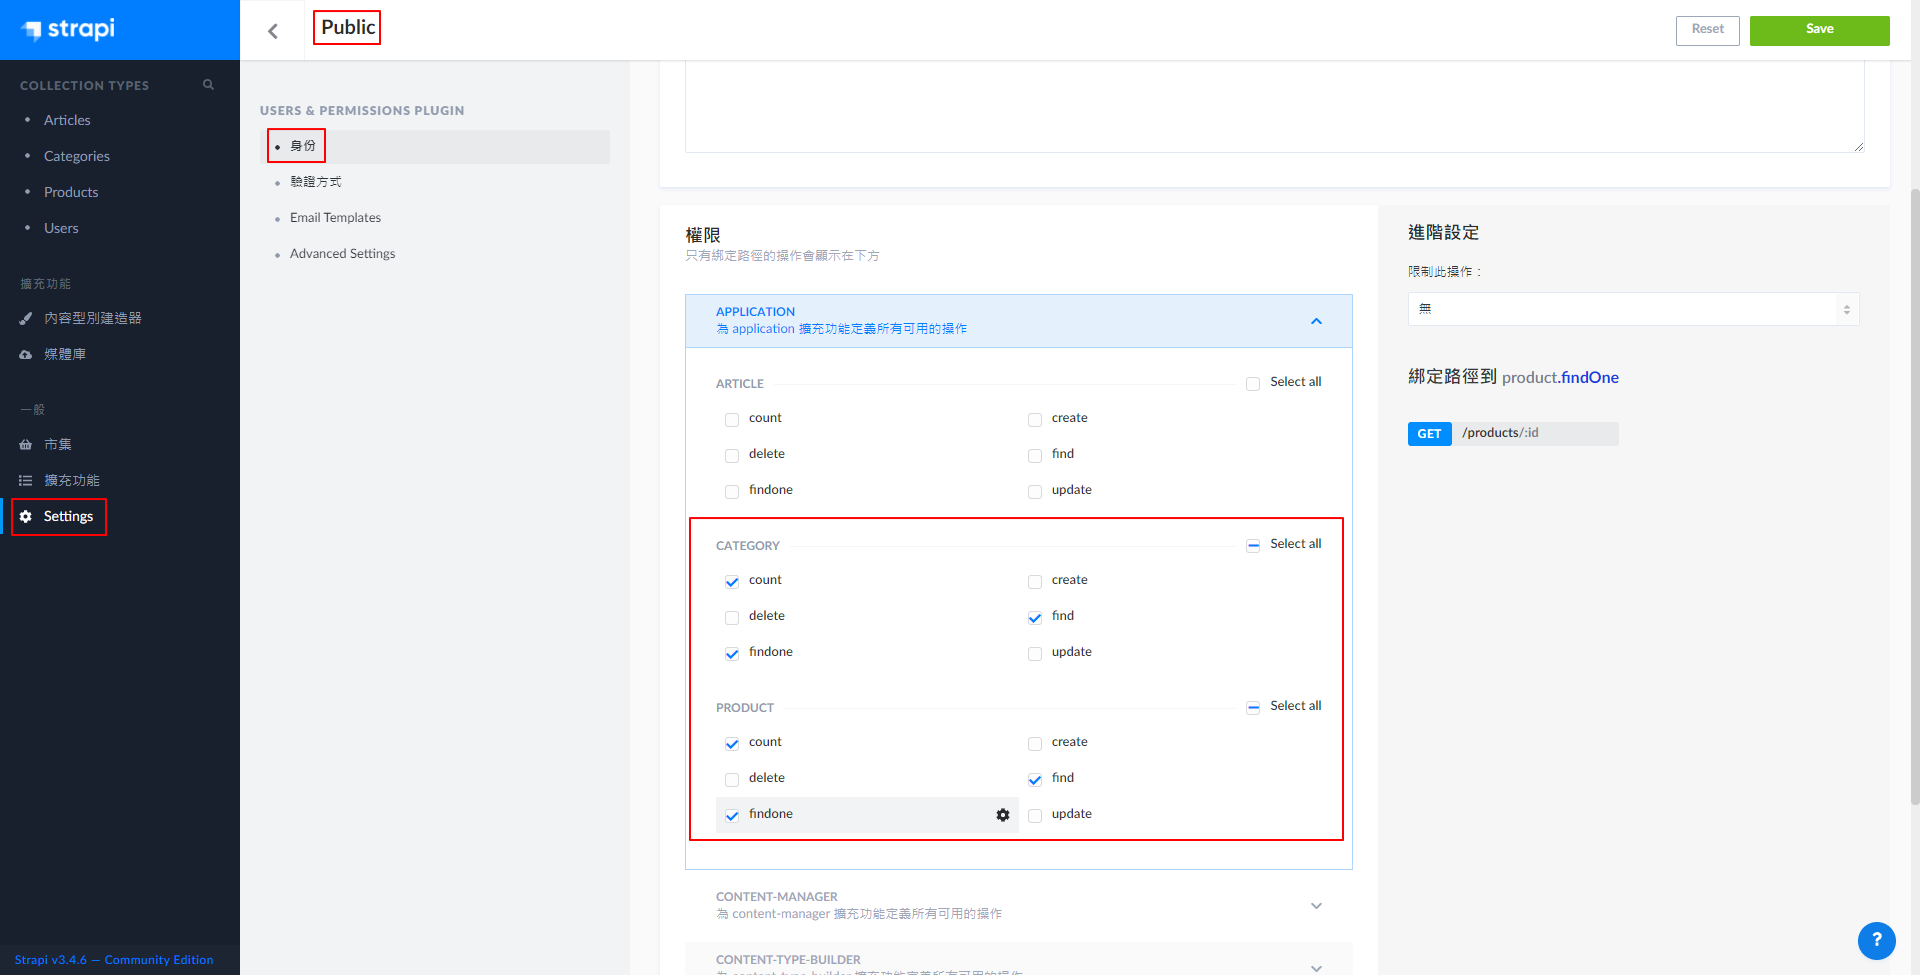
- count => 獲得資料總數
- find => 獲得全部資料
- findOne => 獲得單筆資料
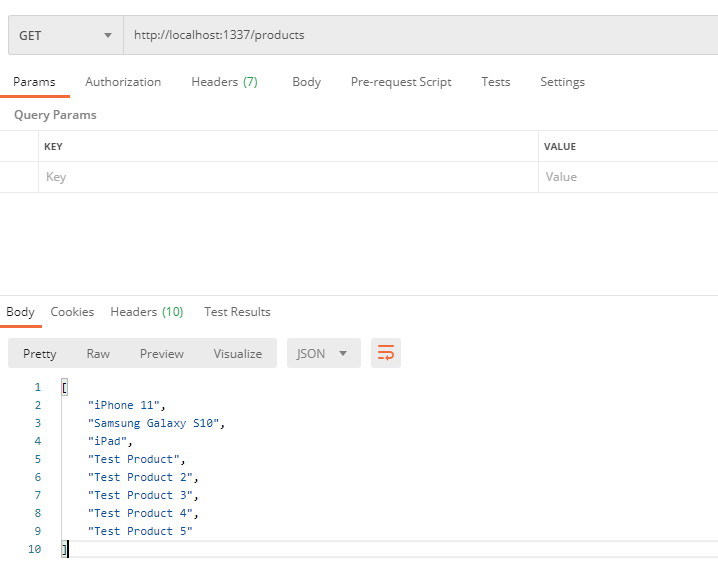
權限設定完畢並儲存後,即可正常呼叫 API。URL 後面可以加 params 做進一步篩選
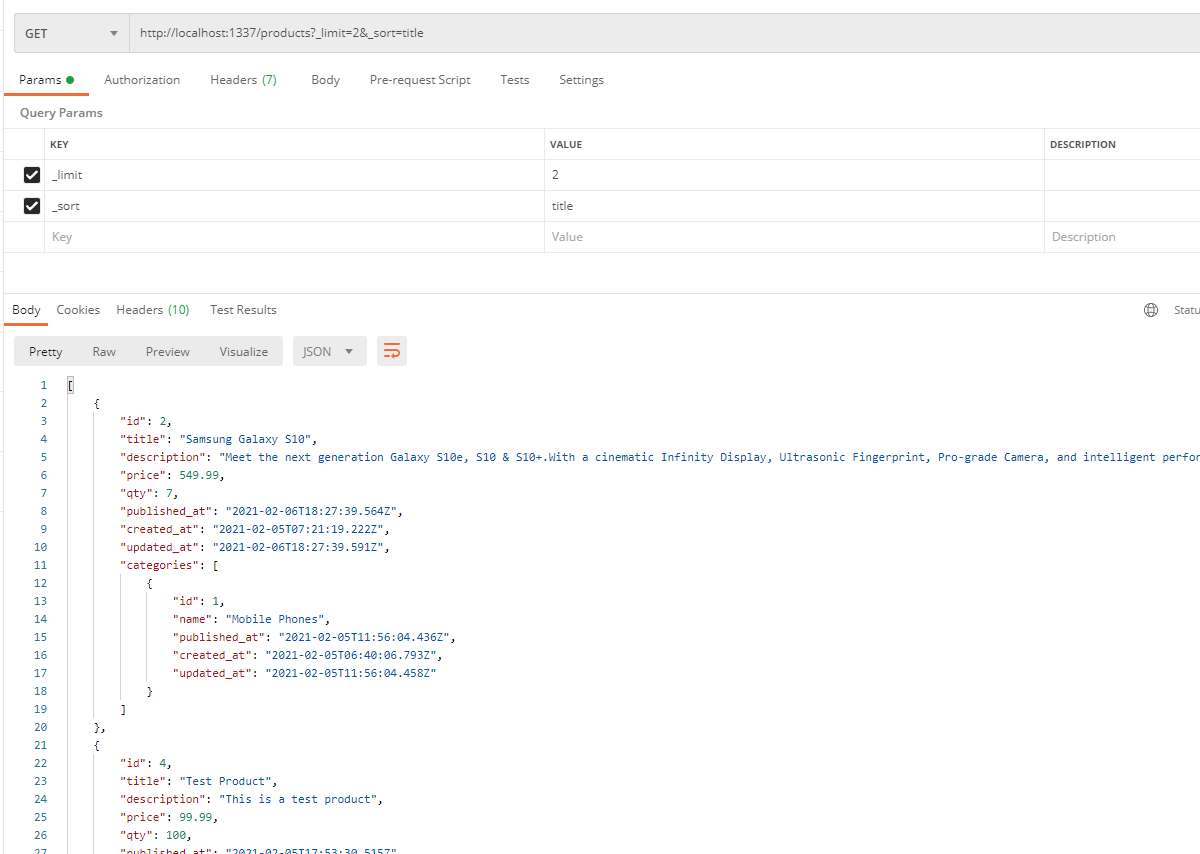
- _limit => 限制資料顯示筆數
- _sort => 依據哪個欄位做排序
新增 Authenticated 身分使用者
上一節在 Public (公開) 身分中加入 product 和 category collection 的資料授權 (主要是 GET 操作)。不過其他像是新增、更新、刪除資料等操作則不適合設為公開,所以這一節要新增 Authenticated User,在進行資料操作前要先 POST User 資訊,取得 JWT token 後才允許進行資料操作。
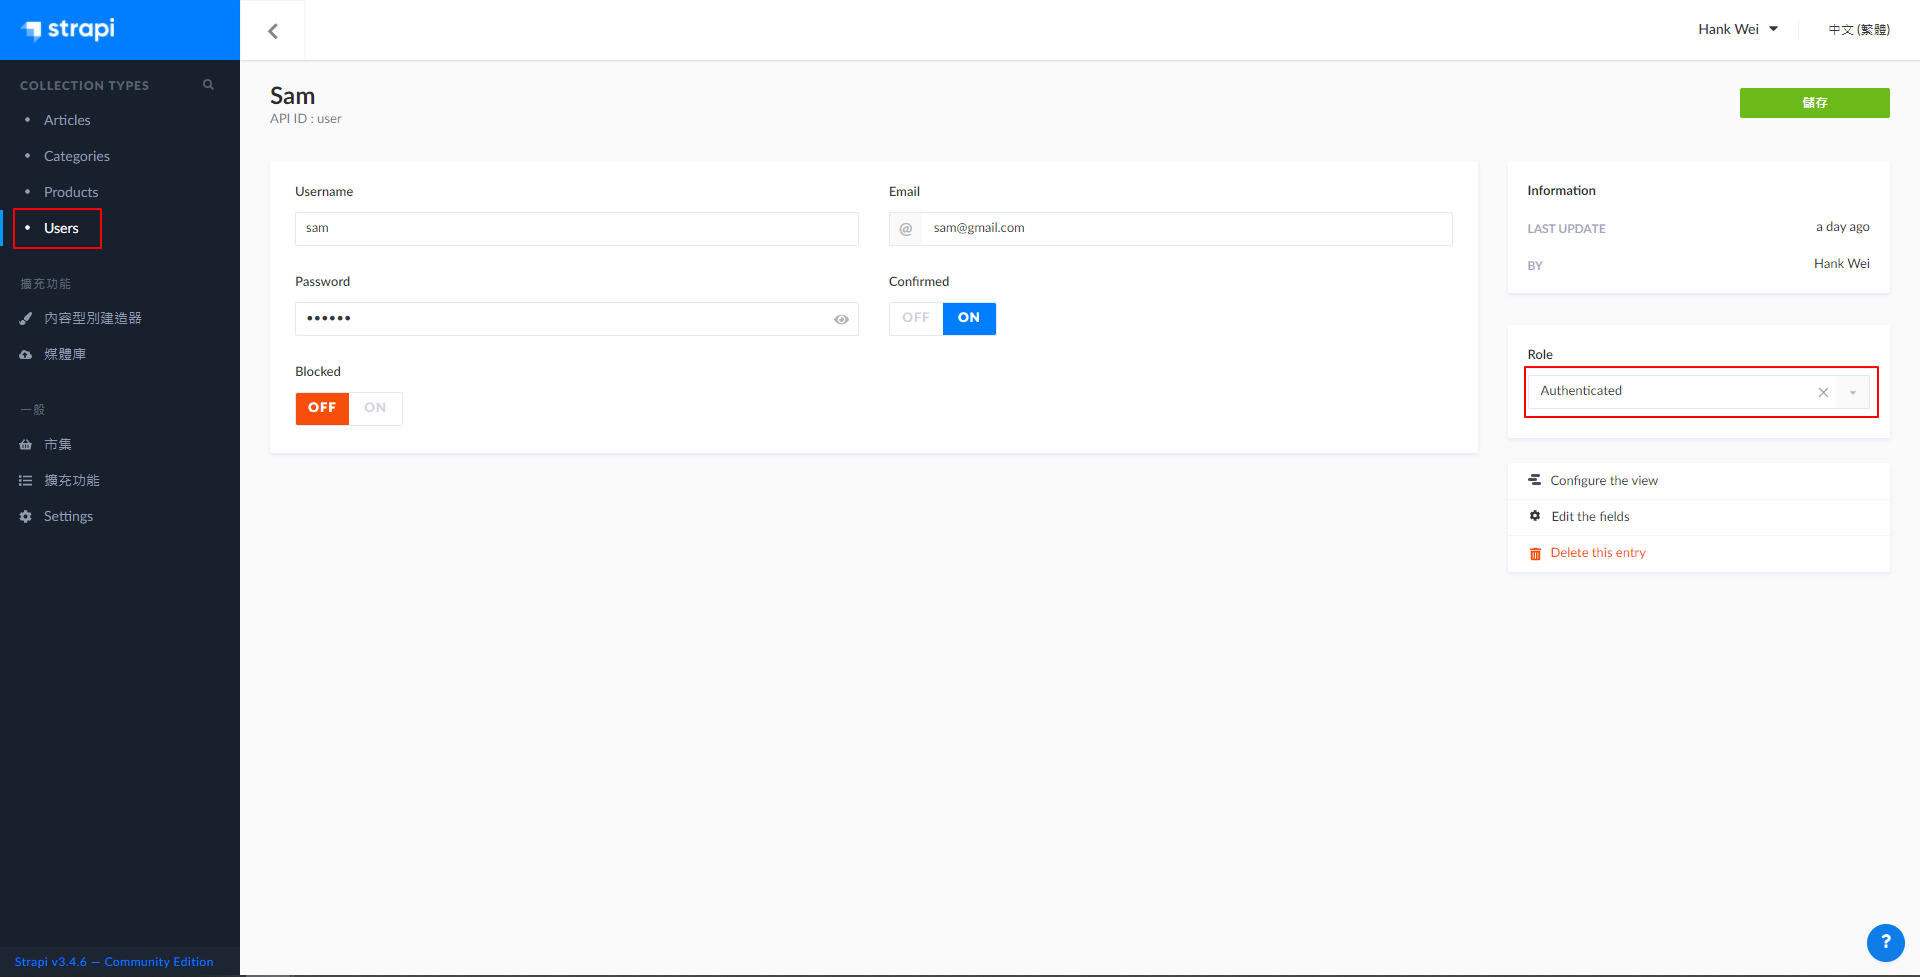
進入 Users (一開始就存在的 collection types) => 建立新的 Users => 設定 Username、Email 和 Password,Role 設為 Authenticated => 儲存
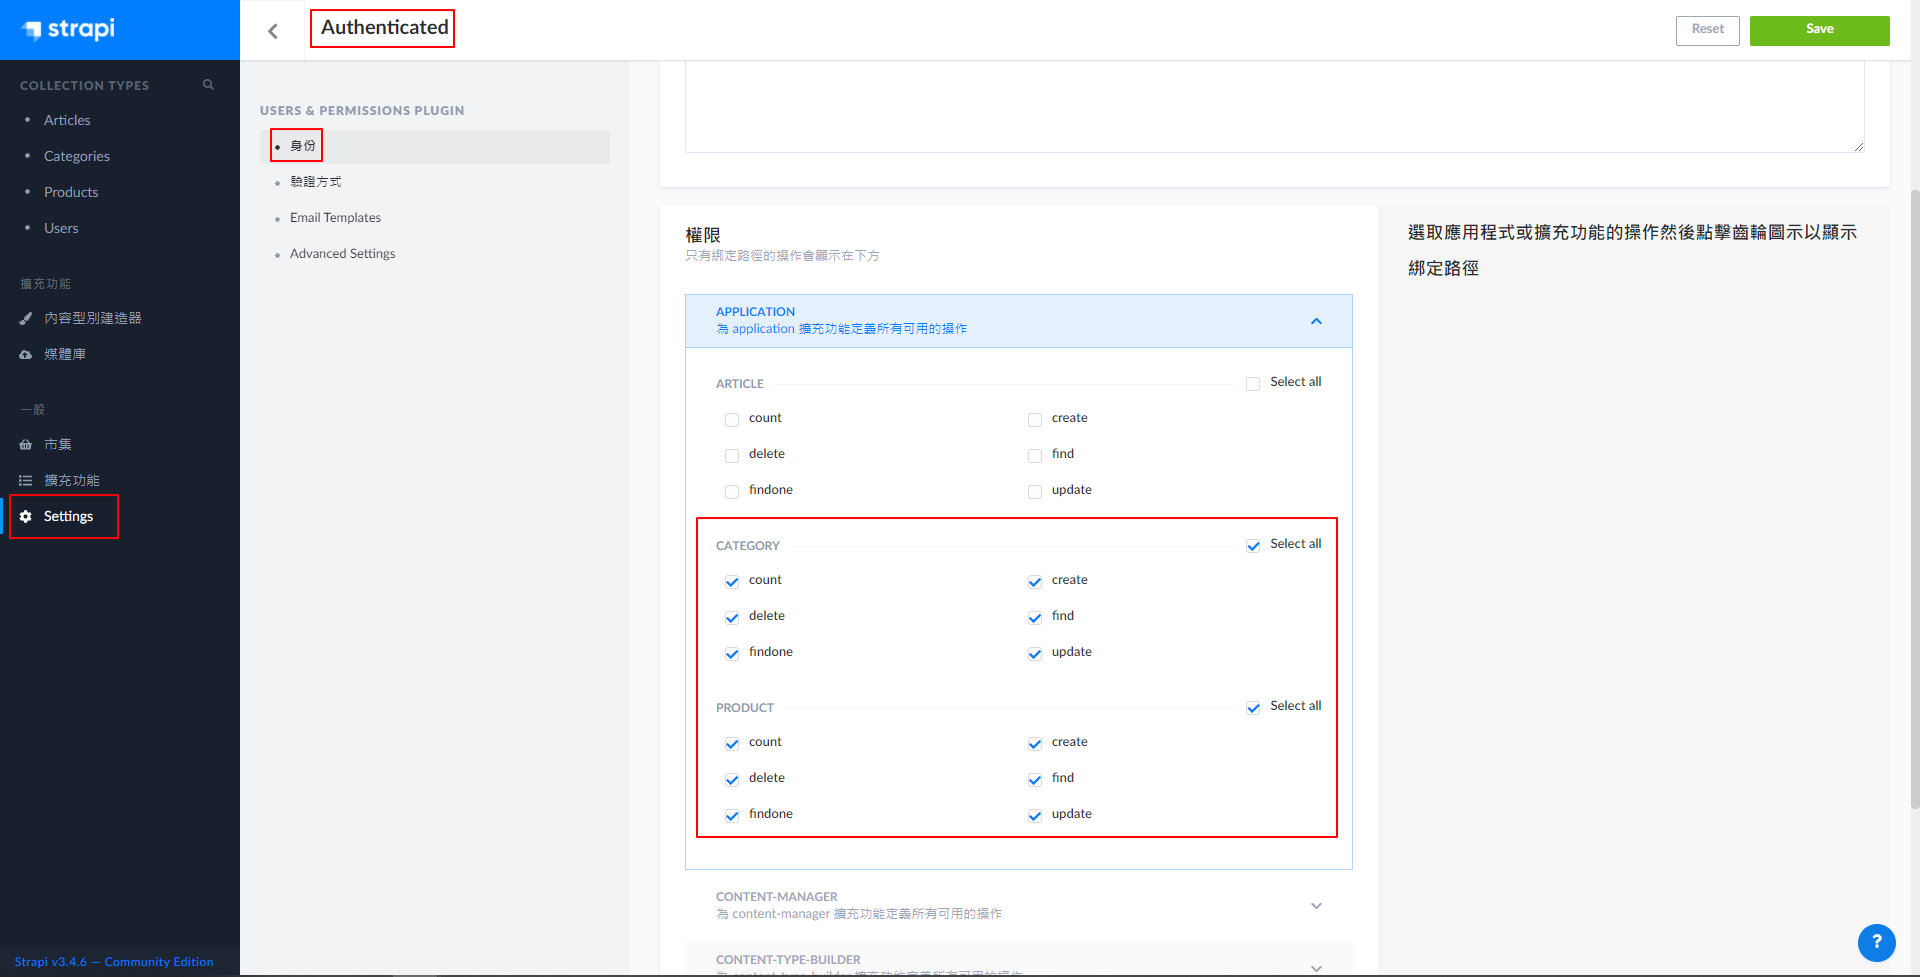
進入 Settings => 身分 => Authenticated => 勾選 Category 和 Product collection 的所有操作權限
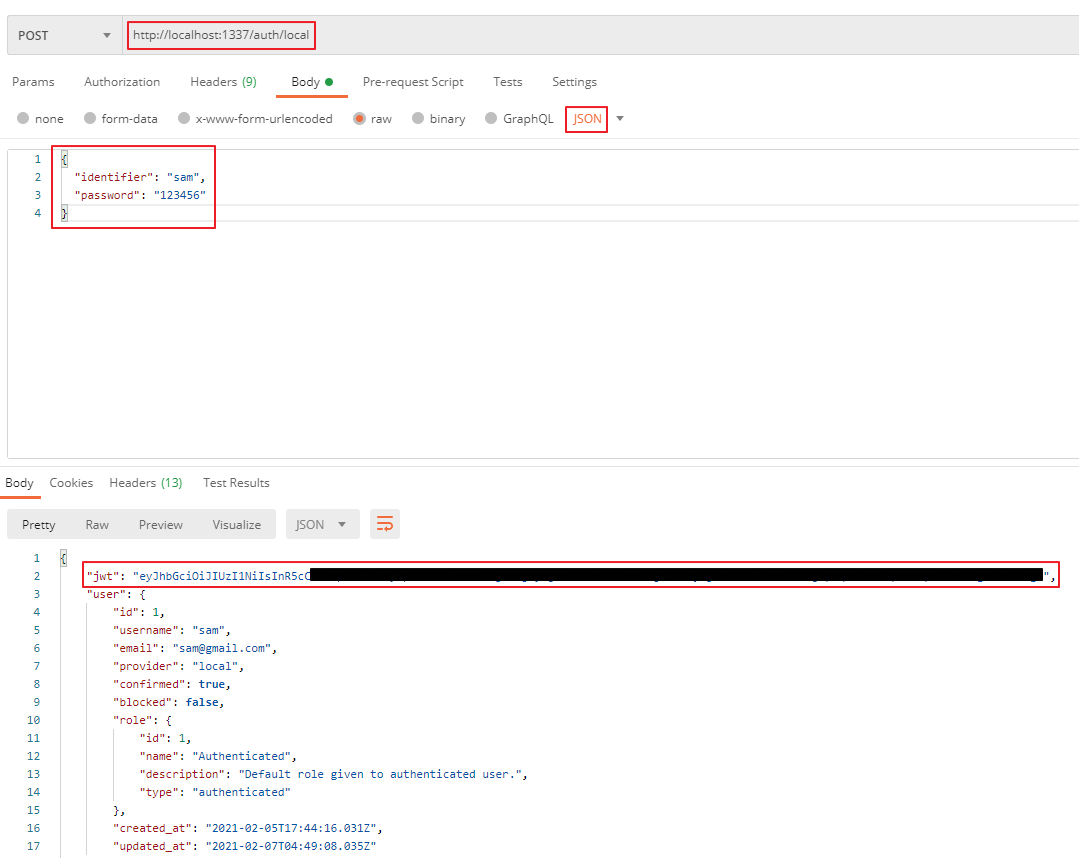
首先 POST user info 到 http://localhost:1337/auth/local,如果通過驗證即可取得 JWT token (Identifier 用 Username 或 Email 都可以)
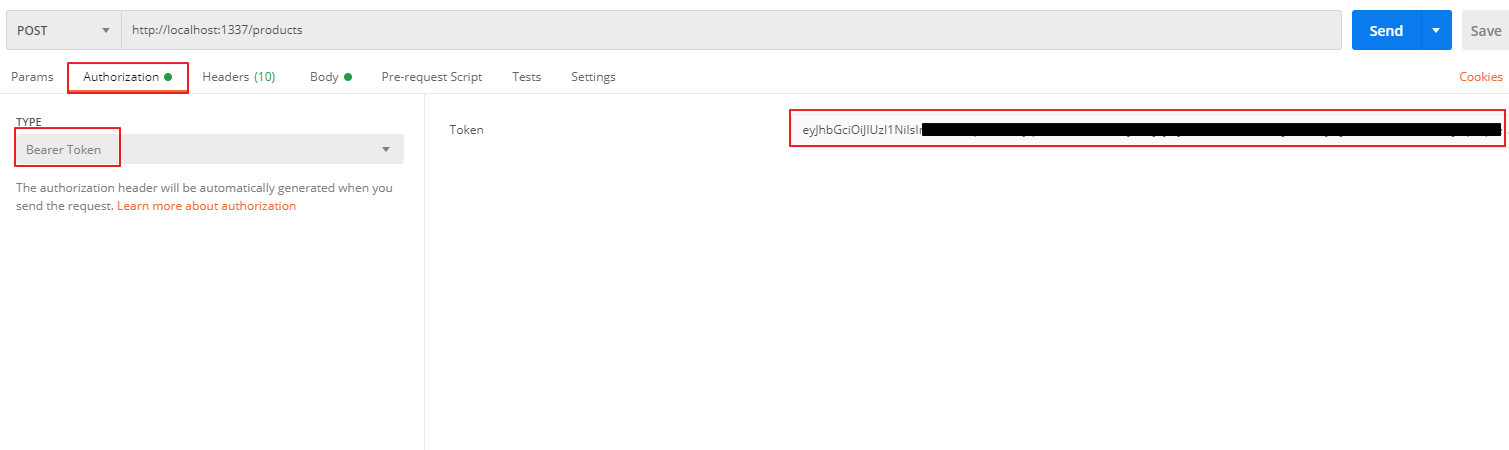
以新增 product collection 資料為例,先將獲取的 token 加入 header,再 POST 新資料 => 新增成功

專案概覽
package.json
記錄安裝插件及各式指令,例如 yarn develop 即可在本地端啟動 app
config/database.js
資料庫相關設定,預設是使用 SQLite,如果要改串其他資料庫的話要在這裡修改
api/
api folder 底下會出現新建立的 collection type folder,例如之前建立的 product、category,內部會涵蓋該 collection 的相關設定
api/product/config/routes.json
記錄 product collection 的 API endpoint 及方法
{
  "routes": [
    {
      "method": "GET",
      "path": "/products",
      "handler": "product.find",
      "config": {
        "policies": []
      }
    },
    {
      "method": "GET",
      "path": "/products/count",
      "handler": "product.count",
      "config": {
        "policies": []
      }
    },
    {
      "method": "GET",
      "path": "/products/:id",
      "handler": "product.findOne",
      "config": {
        "policies": []
      }
    }
  ]
}
api/product/controllers/product.js
可以自訂邏輯覆蓋既有方法,例如重新定義 find 方法,呼叫 /products 時只會回傳 title 資訊
module.exports = {
  async find(ctx) {
    const products = await strapi.services.product.find(ctx.query)
    return products.map(product => product.title)
  }
}
api/product/services/product.js
如果要抽出 reusable logic 或是其他應用需要定義特別的方法,則可以放在 services 中,透過 strapi.services 調用
api/product/models/product.settings.json
product collection 的資料型別在此處定義 (類似 Schema)
{
  "kind": "collectionType",
  "collectionName": "products",
  "info": {
    "name": "product"
  },
  "options": {
    "increments": true,
    "timestamps": true,
    "draftAndPublish": true
  },
  "attributes": {
    "title": {
      "type": "string",
      "required": true,
      "unique": true
    },
    "description": {
      "type": "text"
    },
    "price": {
      "type": "decimal"
    },
    "qty": {
      "type": "integer"
    },
    "categories": {
      "via": "products",
      "collection": "category"
    }
  }
}
api/product/models/product.js
可以在這裡自定義各階段 db lifecycle hooks 的行為,以 afterFind (find 方法執行完畢後觸發) 為例:
module.exports = {
  lifecycles: {
    async afterFind(results, params, populate){
      console.log('After Fetch...')
      console.log(results)
      // db find 結束時,顯示 After Fetch... 字樣及結果
    }
  }
}